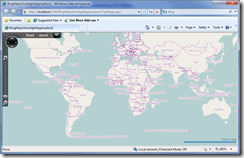
Display OpenStreetMap Imagery using Bing Maps Silverlight Control v1
 The Bing Maps Silverlight SDK documentation on MSDN contains an article on Adding Tile Overlays to the Map, that demonstrates how to overlay your own map imagery over top of the Bing Maps Imagery. However, what if you want to completely replace the Bing Maps Imagery with some other Imagery like the OpenStreeMap Imagery?
In the “Adding Tile Overlays to the Map” article it shows using a “LocationRectTileSource” to add the custom map imagery overlay. To implement the OpenStreetMap imagery you will need to create a simple class that inherits from “TileSource” since you wont be restricting the imagery to only a small portion of the map, but instead will be showing all the OpenStreetMap Imagery in place of the Bing Maps Imagery.
First, Hide the Bing Maps Imagery
Since we will be displaying the OpenStreetMap imagery instead of the Bing Maps Imagery, we want to prevent the Map control from loading/displaying the Bing Maps Imagery completely.
To do this, all you need to do is set the Maps Mode to an instance of the “MercatorMode” object:
<UserControl x:Class="BingMapsSilverlightApplication1.MainPage"
    xmlns="http://schemas.microsoft.com/winfx/2006/xaml/presentation"
    xmlns:x="http://schemas.microsoft.com/winfx/2006/xaml"
    xmlns:m="clr-namespace:Microsoft.Maps.MapControl;assembly=Microsoft.Maps.MapControl"
    xmlns:mCore="clr-namespace:Microsoft.Maps.MapControl.Core;assembly=Microsoft.Maps.MapControl">
    <Grid x:Name="LayoutRoot">
        <m:Map>
            <m:Map.Mode>

                <mCore:MercatorMode></mCore:MercatorMode>
            </m:Map.Mode>
        </m:Map>
    </Grid>
</UserControl>
Display OpenStreetMap Imagery
Next, we will create a simple “OpenStreetMapTileSource” class that inherits from “TileSource” that will be used to specify the location (URI) of the OpenStreetMap Imagery so the Map control can load and display it.
Here’s the simple OpenStreetMapTileSource class:
public class OpenStreetMapTileSource : Microsoft.Maps.MapControl.TileSource
{
    public OpenStreetMapTileSource()
        : base("http://tile.openstreetmap.org/{2}/{0}/{1}.png")
    {
    }

    public override System.Uri GetUri(int x, int y, int zoomLevel)
    {
        return new Uri(string.Format(this.UriFormat, x, y, zoomLevel));
    }
}
Now to put the OpenStreetMapTIleSource in place and actually display the OpenStreetMap Imagery. To do this, we will add a new MapTileLayer to the Maps Children collection, and add an instance of our OpenStreetMapTileSource object to the MapTileLayer objects TileSources collection.
Here’s the code to do this:
<UserControl x:Class="BingMapsSilverlightApplication1.MainPage"
    xmlns="http://schemas.microsoft.com/winfx/2006/xaml/presentation"
    xmlns:x="http://schemas.microsoft.com/winfx/2006/xaml"
    xmlns:m="clr-namespace:Microsoft.Maps.MapControl;assembly=Microsoft.Maps.MapControl"
    xmlns:mCore="clr-namespace:Microsoft.Maps.MapControl.Core;assembly=Microsoft.Maps.MapControl"
    xmlns:local="clr-namespace:BingMapsSilverlightApplication1">
    <Grid x:Name="LayoutRoot">
        <m:Map>
            <m:Map.Mode>

                <mCore:MercatorMode></mCore:MercatorMode>
            </m:Map.Mode>
            <m:Map.Children>
                <m:MapTileLayer>
                    <m:MapTileLayer.TileSources>

                        <local:OpenStreetMapTileSource></local:OpenStreetMapTileSource>
                    </m:MapTileLayer.TileSources>
                </m:MapTileLayer>
            </m:Map.Children>
        </m:Map>
    </Grid>
</UserControl>
Conclusion
It’s really pretty simple to display your own custom map tile image sets and even completely replace the Bing Maps Imagery with the new control. If your interested in seeing how to display Yahoo Maps imagery within the control, then you’ll want to refer to my previous article on doing this with the CTP version of the Bing Maps Silverlight Control.


