First 10 Minutes with Raspberry Pi and Windows 10 for IoT
May 8, 2015 • Chris Pietschmann • Windows • Hardware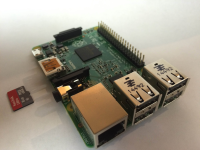
My very first Raspberry Pi arrived yesterday. I’m super excited to get playing, and frankly I probably should have gotten one of the older versions sooner. Now that I’ve got Pi, I can start hacking! Since this is a Raspberry Pi 2 (same goes for the Raspberry Pi 3!), it can run the new Windows 10 for IoT making it easy to build apps for it with C# and Visual Studio. Well, I haven’t gotten to actually building any apps yet, but was able to get Windows 10 for IoT setup.
Install Windows 10 for IoT
Installing Windows 10 for IoT to the Raspberry Pi is a bit different than booting up a PC from USB or DVD to install Windows. To “install” Windows 10 for IoT you need to copy the disk image for Windows 10 for IoT over to a Micro SD card using a PC then put that card into the Raspberry Pi 2. I successfully referenced Scott Hanselman’s “Setting up Windows 10 for IoT on your Raspberry Pi 2” post for doing this.
For quick reference, the steps taken:
- Go to Windows Embedded Connect site and download the Windows 10 for IoT Insider Preview for Raspberry Pi 2
- Plug your Micro SD card into a Windows 10 PC (I used my Surface Pro, but for others a Micro SD card adapter may be required)
- Open the command line on the Windows 10 PC with Administrator privileges
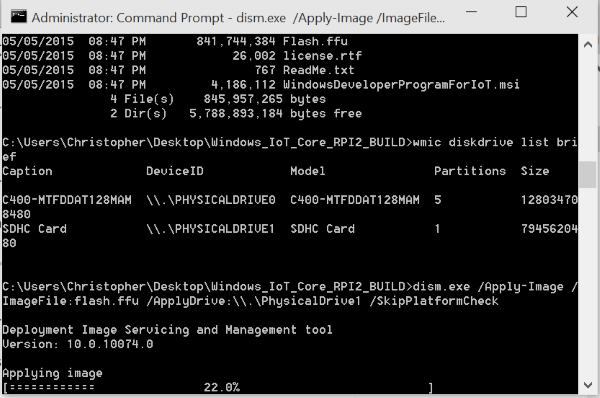
- Run "*wmic diskdrive list brief*" to get the physical disk number of your Micro SD card
- Run *"dism.exe /Apply-Image /ImageFile:flash.ffu /ApplyDrive:\\.\PhysicalDrive**#** /SkipPlatformCheck"* The '#' will be the number for disk number for the Micro SD card.
- Put the Micro SD card into the Raspberry Pi 2
- Connect Raspberry Pi 2 to HDMI and power on
If you want a bigger explanation of the steps, see Scott Hanselman’s post. Thanks Scott!
Here’s a screenshot of the console installing the “flash.ffu” image to the Micro SD card:
Micro SD Card Details

A couple questions I wondered when I bought the Raspberry Pi 2 were:
- How big of a Micro SD card is needed?
- What speed / class of Micro SD card is needed?
After some searching on what size Micro SD card to get I decided to get an 8GB. For a Windows machine that seems really small, but this is an IoT device after all. Plus after downloading the Windows 10 for IoT Raspberry Pi 2 build, I was able to find that the “flash.ff” disk image file was only 802MB. After installing the image to the disk, I opened Explorer to find that the total formatted disk space is 63.7MB with only 12.7MB used.
For the SD Card Speed / Class, I did find somewhere that only a “Class 10” Micro SD card is supported. Then to verify I was able to find the following Known Issue within the Windows 10 for IoT readme:
27. A black screen may be seen during boot because the default app is failing on slow class 4 SD cards. (2462306) WORKAROUND: Do not use a class 4 SD card.
So, at least with the Insider Preview build, a Class 10 Micro SD Card is needed.
Booting up Windows 10 for IoT
Once you have the Windows 10 for IoT image on the Micro SD card, you can put it into the Raspberry Pi 2 and power it on. Make sure you connect an HDMI monitor to it so you can see the screen. Also, for it to connect to the network you’ll need to connect an Ethernet cable too.
Initially, it went though a couple different screens, including a mysterious blank screen.

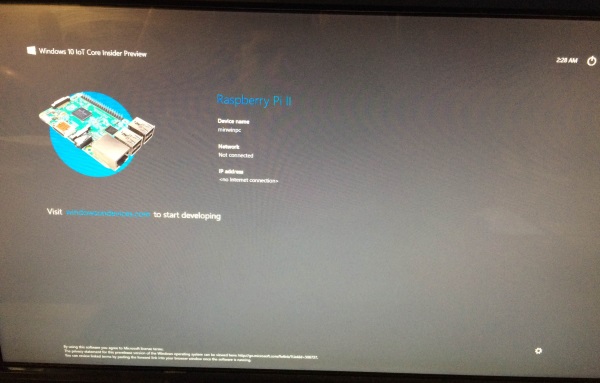
Then after a couple minutes, it displayed the default screen displaying the machine name and IP Address configuration.
Conclusion
This is pretty much as far as I got on day 1. I didn’t have much time, but I just could wait to get things booted up. Now that I know it works I can start hacking soon, hopefully I’ll have time this weekend!
P.S. With the initial research and writing this blog post, I definitely ended up spending more than 10 minutes. But only about 10 minutes of it was spent on Windows 10 for IoT and Raspberry PI.
Chris Pietschmann
DevOps & AI Architect | Microsoft MVP | HashiCorp Ambassador | MCT | Developer | Author
I am a DevOps & AI Architect, developer, trainer and author. I have nearly 25 years of experience in the Software Development industry that includes working as a Consultant and Trainer in a wide array of different industries.


Recent Posts
-
Yes, I'm a Microsoft MVP, HashiCorp Ambassador, and MCT - and I Still Build Real Stuff
17 Apr 2025 -
Microsoft AI Skills Fest Badge Rendered as Pure HTML/CSS
09 Apr 2025 -
C#: What's the Difference Between `int`, `var`, and `dynamic`?
09 Apr 2025 -
Leveling Up with Microsoft AI Skills Fest for Guinness World Record Attempt
08 Apr 2025 -
Chris Pietschmann recognized as a HashiCorp Ambassador for 2025
31 Mar 2025
Recent on Build5Nines.com


