Bing Maps Silverlight CTP: Using Tile Layers to Overlay Custom Map Imagery
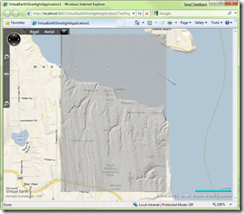
Mar 20, 2009 • Chris Pietschmann • Mapping • SilverlightOne of the features that the Virtual Earth JavaScript Control has is the ability to add custom Tile Layers to overlay your own custom imagery over the map. The Virtual Earth Silverlight control also supports this feature.
This was written for the Bing Maps Silverlight CTP Release.
Before I begin to explain how to add custom Tile Layers to the Map it’s important to note that you can still use the MapCruncher tool to generate Map Imagery Tiles to be used with the custom Tile Layers. The specifics of using the MapCruncher tool to generate Map Imagery Tiles isn’t within the scope of this article. You can find a tutorial on how to use MapCruncher here: http://research.microsoft.com/en-us/um/redmond/projects/mapcruncher/tutorial/version3.0docs/index.htm ## Add Custom Tile Layer using Code
 Once you have some custom Map Imagery Tiles generated from using MapCruncher, you can then add them using an instance of the LocationRectTileSource object and adding it to a MapTileLayer on the Map.
To do this we will following the below steps: <ol> <li>Create a MapTileLayer object </li> <li>Create a LocationRect object that defines the bounding rectangle for our map tile overlay </li> <li>Create a LocationRectTileSource <ol> <li>Point it to the Uri of our custom Map Imagery Tiles </li> <li>Set the Minimum and Maximum Zoom Levels (ZoomRange) that the imagery is to be visible within </li> <li>Set the Bouding Rectangle to the LocationRect object we previously created </li> </ol> </li> <li>Add the LocationRectTileSource to the MapTileLayer’s TileSources collection property </li> <li>Set the MapTileLayer’s Opacity to the desired value </li> <li>Add the MapTileLayer to the Children collection of the Map </li> </ol>
Here’s some sample code that will add a custom Tile Layer using the imagery that the JavaScript Map Controls SDK uses as an example for this same thing:
// Create a Tile Layer that will display our custom Map Imagery Tiles
var customTileLayer = new MapTileLayer();
// Define the Bounding Rectangle
LocationRect boundingRect = new LocationRect(
new Location(49, -123),
new Location(47, -121)
);
// Create a LocationRectTileSource
LocationRectTileSource customTileSource = new LocationRectTileSource();
// Set the Uri for the custom Map Imagery Tiles
customTileSource.UriFormat = “http://dev.live.com/virtualearth/sdk/layers/lidar/{0}.png”;
// Set the Min and Max Zoom Levels that the imagery is to be visible within
customTileSource.ZoomRange = new Range
Chris Pietschmann
Cloud Infra & Security | Microsoft MVP | HashiCorp Ambassador | MCT | Developer | Author
I am a solution architect, SRE, developer, trainer and author. I have nearly 25 years of experience in the Software Development industry that includes working as a Consultant and Trainer in a wide array of different industries.


