Bing Maps Silverlight CTP: Overlay OpenStreetMap, OpenAerialMap and Yahoo Map Imagery using Custom Tile Layers!
Mar 20, 2009 • Chris Pietschmann • Mapping • SilverlightUPDATE: I have written a newer version of this article to specifically target the latest Bing Maps Silverlight Control Version 1.0 Release.
**You can find the new article here: Display OpenStreetMap Imagery using Bing Maps Silverlight Control v1 **
In the “Using Tile Layers to Overlay Custom Map Imagery” article I showed you how to overlay your own Custom Map Imagery that you generated using the MapCruncher tool on top of the Map. Now, in this article I’ll show you what you need to know in order to overlay map imagery from other competing mapping services (OpenStreetMap, OpenAerialMap and Yahoo Maps). This allows you to easily build in functionality that allows your users to easily switch (with the click of a button or selection of a dropdown) which mapping service imagery is used to visualize the data in your application.
This was written for the Bing Maps Silverlight CTP Release.
Beware: This article is just a demo of how this is possible. If you do implement this, you need to keep in mind that you’ll need to then adhere to both the Virtual Earth Silverlight Control CTP Terms of Use and the Terms of Use for which ever mapping services data you are displaying.
Before I begin, I’d like to thank the awesome guys that are working on the DeepEarth Project.
Now to the exciting stuff!
Overview of What’s Needed
The steps to create a Tile Layer that displays Map Imagery from the mentions services is very similar to the method mentioned in the “Using Tile Layers to Overlay Custom Map Imagery” arcticle, with the exception that you need to create your own Custom Tile Source object that inherits from TileSource.
Here’s the steps needed to do this:
- Create a Custom Tile Source (inheriting from TileSource) object
- Define the “uriFormat” to be used to generate the Uri of the Map Images.
- Override the”GetUri” method. This method uses the “uriFormat” to generate the Uri of the Map Images.
- Add the Tile Source to the Map
- Create a MapTileLayer object instance
- Create an instance of you Custom Tile Source object
- Add the Custom Tile Source object to the MapTileLayer
- Set the MapTileLayer’s Opacity to the desired value
- Add the MapTileLayer to the Children collection of the Map
The TileSource objects “GetUri” method takes the following 3 arguments:
- **x** – The horizontal position of the tile.
- **y** – The vertical position of the tile.
- **zoomLevel** – The zoom level of the tile.
You then need to convert (within this method) the x, y, and zoomLevel values into the correct values to be passed using the uriFormat to load the map imagery tiles. This can take a little work in some cases (as with Yahoo Maps) and it an be straight forward in others (as with OpenStreetMap and OpenAerialMap).
Also, when you’re showing Map Imagery that will completely overlay over the top of the Virtual Earth Imagery, it’s a good practice to set the Map’s Mode to an “Empty” mode that will prevent the Virtual Earth imagery from even being downloaded for display. This will increase performance a little (whether you notice it or not), and it will prevent you from using up unnecessary transactions using the Virtual Earth Web Service (this is how the control loads the Virtual Earth imagery behind the scenes.)
Create a TileSource for OpenStreetMap
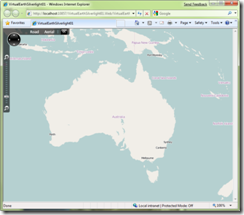 First we need to create custom TileSource object, set the UriFormat to be used to generate the Imagery Uri, and then override the “GetUri” method with code that generates the appropriate Imagery Uri’s using “String.Format”.
The resulting Custom Tile Source object is so simple, it’s probably easier to just show you the code.
namespace VirtualEarthSilverlight01
{
public class OpenStreetMapTileSource : Microsoft.VirtualEarth.MapControl.TileSource
{
public OpenStreetMapTileSource()
: base(“http://tile.openstreetmap.org/{2}/{0}/{1}.png”)
{
}
    public override Uri GetUri(int x, int y, int zoomLevel)
    {
        return new Uri(String.Format(this.UriFormat, x, y, zoomLevel));
    }
}      }
If you aren’t familiar with the above method of using “String.Format” to replace certain placeholders within a string with specific values, you can reference the MSDN Documentation here.
Now using the described overview above, we can add the new OpenStreetMapTileSource object to a MapTileLayer on the Map and display the OpenStreetMap Imagery within the Silverlight Map Control. Here’s an example of doing this with XAML.
Also, since the OpenStreetMapTileSource object is contained within the projects namespace (“VirtualEarthSilverlight01”) we need to also add a namespace reference to the XAML file. In the example above I’m giving it the prefix of “local”. Once the namespace is included, we can then use our OpenStreetMapTileSource object within the XAML.
Create a TileSource for OpenAerialMap
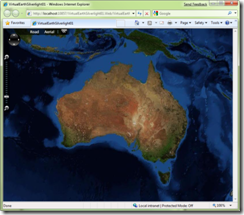 The process of creating a Custom Tile Source and adding it to the Map is identical for OpenAerialMap Imagery as the above example for OpenStreetMap; with the exception of the uriFormat that is used to load the imagery. So, I’m not going to re-explain the process all over again. Instead, I’ll just show you the code.
The resulting Custom Tile Source object for showing OpenAerialMap Imagery:
namespace VirtualEarthSilverlight01
{
public class OpenAerialMapTileSource : Microsoft.VirtualEarth.MapControl.TileSource
{
public OpenAerialMapTileSource()
: base(“http://tile.openaerialmap.org/tiles/1.0.0/openaerialmap-900913/{2}/{0}/{1}.jpg”)
{
}
    public override Uri GetUri(int x, int y, int zoomLevel)
    {
        return new Uri(String.Format(this.UriFormat, x, y, zoomLevel));
    }
}      }
Here’s some example XAML that adds the OpenAerialMapTileSource object to the Map:
Create a TileSource for Yahoo Maps (Street, Aerial and Hybrid)
Again, the process for creating a Custom Tile Source for Yahoo Maps and adding it to the Map is almost identical to the above examples. Except, with Yahoo maps there’s a little math that needs to be done to convert the x, y and zoomLevel arguments that are passed in to the “TileSource.GetUri” method to be the correct values need to load the Yahoo Maps Imagery. I’m not going to cover the process of what’s needed to convert them from the Virtual Earth values to the Yahoo Maps values, but the as you’ll see below the code needed is fairly simple.
Yahoo Maps – Street Imagery
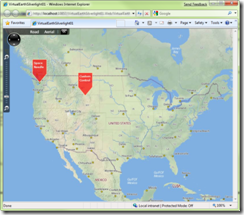 Here’s the code for the Custom Tile Source for Yahoo Maps Street Imagery:
namespace VirtualEarthSilverlight01
{
public class YahooStreetTileSource : Microsoft.VirtualEarth.MapControl.TileSource
{
public YahooStreetTileSource()
: base(“http://us.maps2.yimg.com/us.png.maps.yimg.com/png?v=3.52&t=m&x={0}&y={1}&z={2}”)
{
}
    public override Uri GetUri(int x, int y, int zoomLevel)
    {
        // The math used here was copied from the DeepEarth Project (http://deepearth.codeplex.com)
        double posY;
        double zoom = 18 - zoomLevel;
        double num4 = Math.Pow(2.0, zoomLevel) / 2.0;

        if (y < num4)
        {
            posY = (num4 - Convert.ToDouble(y)) - 1.0;
        }
        else
        {
            posY = ((Convert.ToDouble(y) + 1) - num4) * -1.0;
        }

        return new Uri(String.Format(this.UriFormat, x, posY, zoom));
    }
}      }
And, here’s some example XAML that adds the YahooStreetTileSource object to the Map:
Yahoo Maps – Aerial Imagery
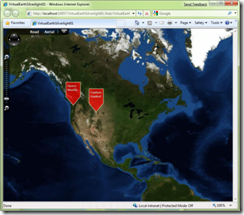 Here’s the code for the Custom Tile Source for Yahoo Maps Aerial Imagery:
namespace VirtualEarthSilverlight01
{
public class YahooAerialTileSource : Microsoft.VirtualEarth.MapControl.TileSource
{
public YahooAerialTileSource()
: base(“http://us.maps3.yimg.com/aerial.maps.yimg.com/tile?v=1.7&t=a&x={0}&y={1}&z={2}”)
{
}
    public override Uri GetUri(int x, int y, int zoomLevel)
    {
        // The math used here was copied from the DeepEarth Project (http://deepearth.codeplex.com)
        double posY;
        double zoom = 18 - zoomLevel;
        double num4 = Math.Pow(2.0, zoomLevel) / 2.0;

        if (y < num4)
        {
            posY = (num4 - Convert.ToDouble(y)) - 1.0;
        }
        else
        {
            posY = ((Convert.ToDouble(y) + 1) - num4) * -1.0;
        }

        return new Uri(String.Format(this.UriFormat, x, posY, zoom));
    }
}      }
And, here’s some example XAML that adds the YahooAerialTileSource object to the Map:
Yahoo Maps – Hybrid Imagery
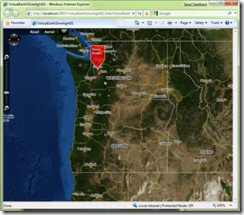 One thing with the Yahoo Maps Hybrid Imagery is it only shows the roads in the imagery, everything else is transparent. So in order to get the same view as the Virtual Earth Hybrid Map Mode, you need to add the Yahoo Maps Aerial Imagery to the Map, then add the Yahoo Maps Hybrid Imagery so it overlays on top of the the Aerial imagery. You’ll see below that this is really simple to do.
Here’s the code for the Custom Tile Source for Yahoo Maps Hybrid Imagery:
namespace VirtualEarthSilverlight01
{
public class YahooHybridTileSource : Microsoft.VirtualEarth.MapControl.TileSource
{
public YahooHybridTileSource()
: base(“http://us.maps3.yimg.com/aerial.maps.yimg.com/png?v=2.2&t=h&x={0}&y={1}&z={2}”)
{
}
    public override Uri GetUri(int x, int y, int zoomLevel)
    {
        // The math used here was copied from the DeepEarth Project (http://deepearth.codeplex.com)
        double posY;
        double zoom = 18 - zoomLevel;
        double num4 = Math.Pow(2.0, zoomLevel) / 2.0;

        if (y < num4)
        {
            posY = (num4 - Convert.ToDouble(y)) - 1.0;
        }
        else
        {
            posY = ((Convert.ToDouble(y) + 1) - num4) * -1.0;
        }

        return new Uri(String.Format(this.UriFormat, x, posY, zoom));
    }
}      }
And, here’s some example XAML that adds the YahooAerialTileSource and YahooHybridTileSource objects to the Map:
Conclusion
As you can see, the ability to overlay custom map imagery of any kind (like OpenStreetMap or Yahoo Maps Imagery) really offers some great flexibility in the control. Plus, it’s easy to do!
Previous Tutorial/Article:** **Using Tile Layers to Overlay Custom Map Imagery
Next Tutorial/Article: Using MouseClick Event To Add “Pushpins”
Chris Pietschmann
DevOps & AI Architect | Microsoft MVP | HashiCorp Ambassador | MCT | Developer | Author
I am a DevOps & AI Architect, developer, trainer and author. I have nearly 25 years of experience in the Software Development industry that includes working as a Consultant and Trainer in a wide array of different industries.


